Wednesday, March 27, 2013

Confused Sturmey Archer Hub, Part 3 - Deciding which bike to put it on.

I have decided to lace up the 1957 Sturmey Archer three speed hub onto a 27" rim and i'm going to 
put it onto my 1970's Schwinn Suburban.
I plan to keep the hand brakes on top of having the coaster brake.  I will be building it on Saturday,
and i will be posting a step by step process on how i do it.

Keep on Biking....

Confused Sturmey Archer Hub, Part 2 - Opening it up


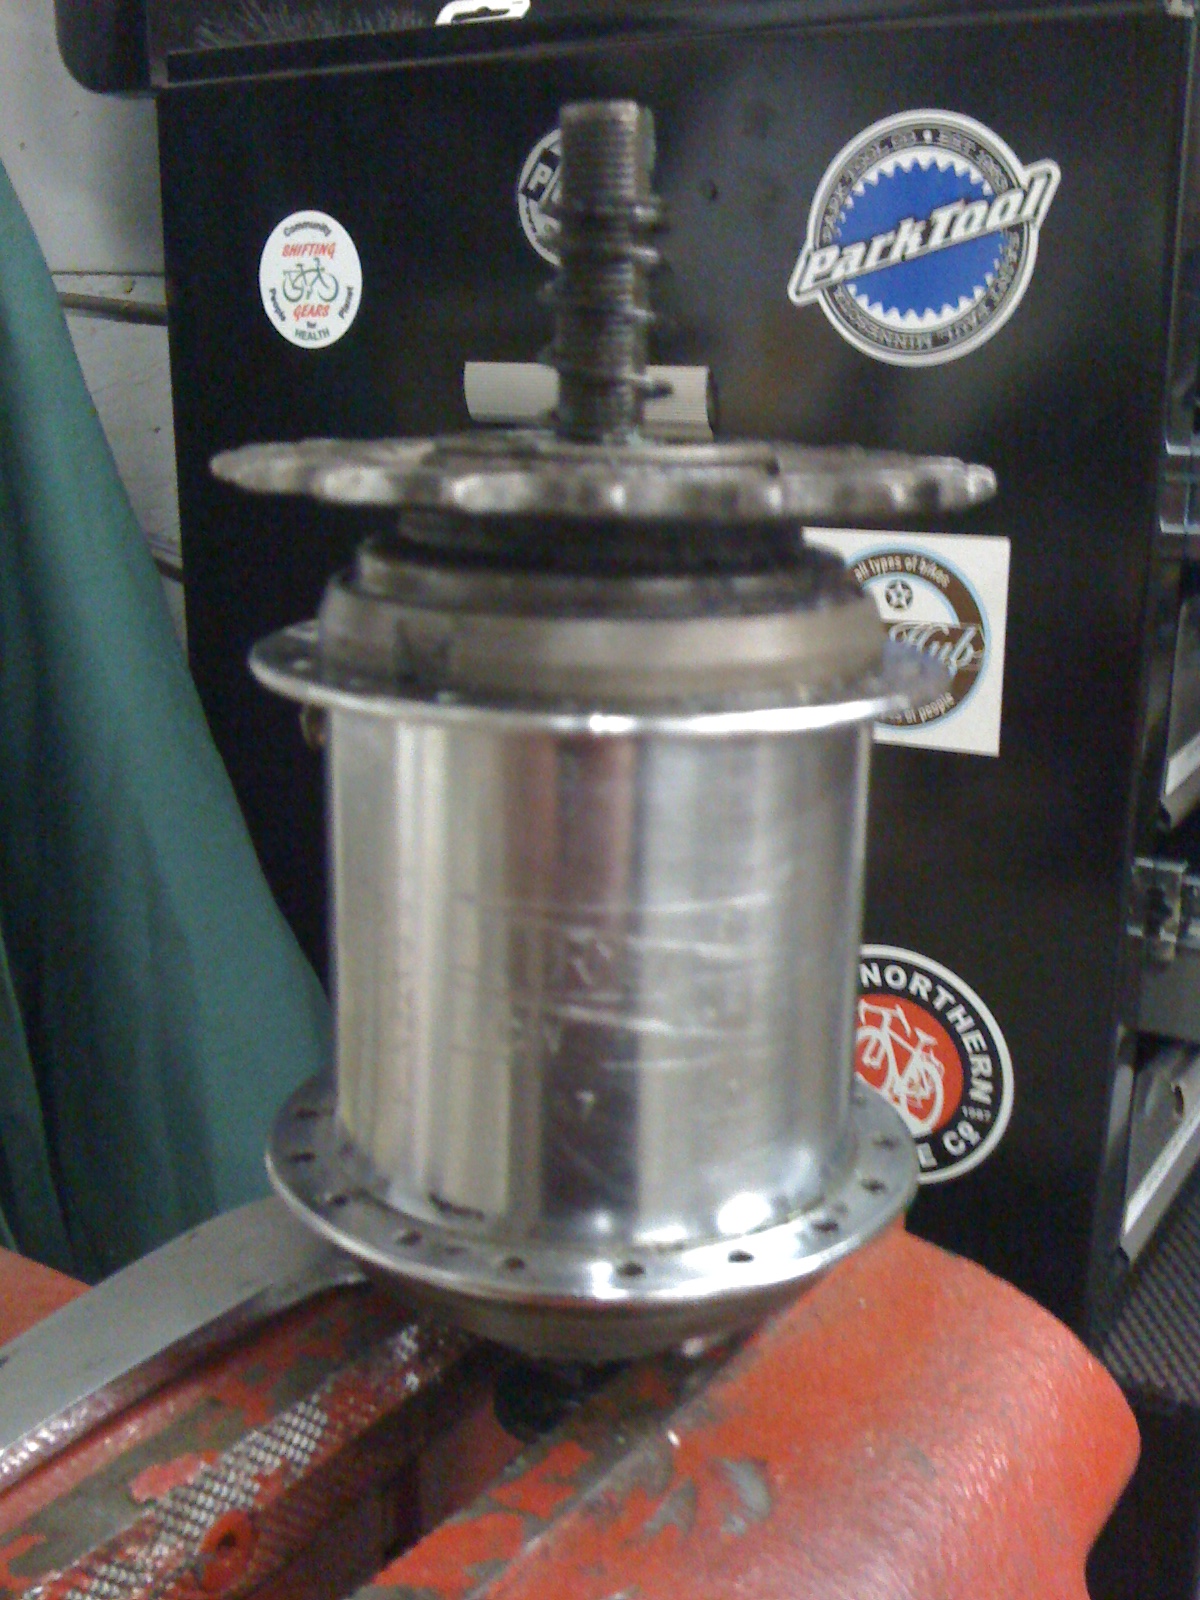
I got it opened up today, i have only opened up a couple before this one, but i will say this, it was fun to see inside it.  The first time i did this to a single speed with a coaster brake, i never got it back together.  
I have been fast teaching myself things about internal hubs and lacing wheels. 
 I watched this video: http://www.youtube.com/watch?v=mIU6mi0K4Y4.  
It shows you how to lace a 36 spoke hole BMX bike wheel, but it's all the same just different size wheel.
As far as learning about internal hubs, I've been listening to Dan and Diane at the shop, as well as 
internet research. 

It took me about half an hour to open it up and close it back up, and here's what and how i did it:

First i took out the pin, then took off the nut, washer, lock bolt and the bearing cup.

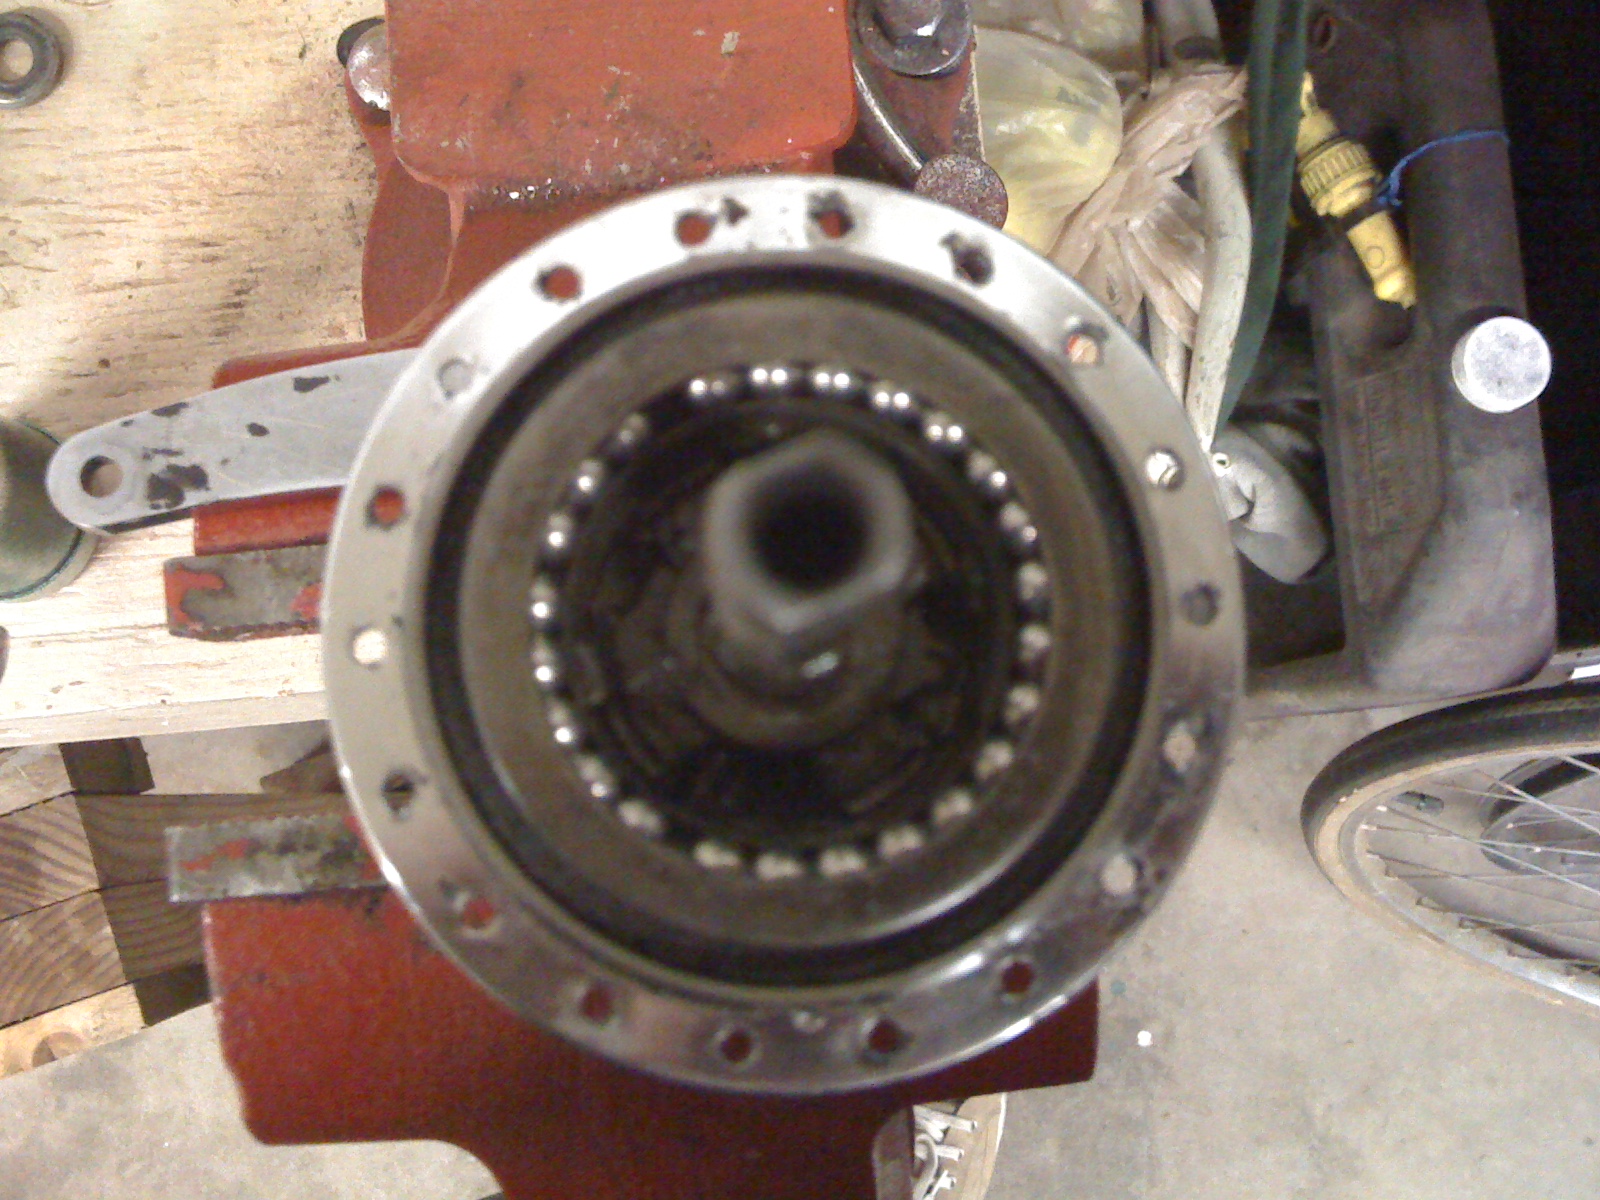
after i took the bearing cup off, i took the spring out and the cog.

 what the spring does is pulls the pin into the hub by pushing on the gear, 
for when you shift from gear to gear.

I laid the parts out in order of how they came off, so i wouldn't get them mixed up.


That piece inside that looks like a "X" that is the gear.  
Really there is only one gear inside, and when you shift the gear, it catches on
lumps inside that make up 1st, 2nd, and 3rd gear.  
I tried to get a good picture of it but it didn't work real well.  
I got everything pulled out and looked inside,
and was able to see that it was a three speed hub.
These hubs are sometimes a pain to calibrate with the shifter, from what i have experienced.
I put some Phil Tenacious Oil into it and some Poly lube 1000 onto the bearings.
Phil Tenacious Oil is really good for internal hubs

After i oiled and greased it up, i started putting it back together, 
but when i started to do that i put the cog back on and then the bearing cup, but i forgot to 
include the spring on the axle under the bearing cup only after i got the cup half way down 
the axle.  i wasn't paying attention to what i was doing, i had gotten interrupted by a phone call.
It looks good now that i got it back together.  I am going to lace it into a 700c rim, but not sure what bike i'll
put it on. When i get it laced up, i'll blog about it, it probably won't be until sometime next week though.

Keep on Biking....

Tuesday, March 26, 2013

Too warm to work

"Magna bike i borrowed from the shop to ride on the snowmobile trails."

I was going to try to get to open up and fix it, but the day was too nice to just sit inside and do things, it made it to 36 above zero, so i did a few miles around town.  this weekend is suppose to be really nice as well.  Tomorrow i know i will get it opened up, so i will blog about it when i do so.  

Keep on Biking....

Monday, March 25, 2013

Confused Sturmey Archer Hub, Part 1 - About


I have an old internal shifting Sturmey Archer hub that is from July 1957.  I was told that it was a three speed, but i built it into a 700c wheel, and tried to adjust it with a three speed shifter, but it would only shift into two speeds.  I looked it up and it is a three speed.  It's a TCW model, Sturmey Archer three speed internal shifting hub.  The only thing i can say is that it is very confused about what it wants to be now that it's 56 years old, i think that it's going through a mid life crisis or something.  I went looking on Google and the first thing that came up was Sheldon Brown.com about the different types of Sturmey Archer hubs.  That's how i found out that it was a three speed.  I'm going to be opening it up tomorrow to see whats wrong with it.  I will be taking lots of pictures as I go along in the process of opening it up and fixing it.  See you all tomorrow...

Keep on Biking.....

Saturday, March 16, 2013

New addition to my blog

I just put up two new things:


  1. Total Page view counter,
  2. Bicycle Questions and Surveys.
Every week  or so i will be asking a new question.  At the end of that week i will post the answer, if it's a survey i will put up the top picked answers.  I will possibly be adding more things soon, just keep checking back every so often.  With my new computer i can do more things like this, i will be updating and posting more tomorrow.  Please check back.


Keep on Biking....

Wednesday, March 13, 2013

I have a new Computer!

I have a new computer now!  YAY!!!!  I gave my old computer to Jim's cousin Cody the other day, and he was able to save most of the stuff on my computer but the computer was only good for parts, so he gave me one that he had in exchange for mine.  I agreed it's the same thing just from Acer rather than Toshiba.  I will be able to blog a lot better now that i have this computer.  There will be more pictures in my posts, i know some of you have been wanting more pictures.  I have so much that i want to post but i will in time, so please keep checking back for more.

Thanks and Keep on Biking....

Hey Everyone,


Hi Everyone,
 I haven't been blogging much, because i have been in the process of trying to find a job.  The job that i have now does not give very many hours, and i need more than ten hours this weekend and none the next, or nothing for about a month.  There was a period of time where i didn't get any hours for about a month and a half.  I need a better job.  I am trying to get employed at a new bike shop that is putting up there second location here, it's going to be probably opening up between the begining or middle of April 2013.  I hope that i can get something, please pray for me or cross your fingers or do both, i could use the help.

Right now the computer that i have been using doesn't let me upload pictures to my blog, and i'm not sure why.  I am going to have my windows 7 computer looked at and hopefully it can be saved, but if not, oh well i guess.

I have been working on my Raleigh Concord, I have updated it a lot in the last month or so.  I have repainted it, different tires (27" to 700c's), new bontrager fenders, new panniers, better seat, sealed bottom bracket, rebuild/laced up Shimano Nexus 4 speed internal hub on a 700c rim 36 hole, and i just installed an antique Schwinn approved generator head and tail light (and i love it, i have been looking to get one for the last couple years).  On Saturday, Dan, Jim, and Me all went up to Diane Pittman's place for an afternoon to hang out, have some lunch, and screw around in her shop.  It was fun, she has everything you can imagine for every kind of bike. I asked her if she had one and she went to a cabinet and pulled this one out and gave it to me.  Thank You Diane!

I also just worked on a Birdy rm folding suspension bike and got it running, i rode it around town. I'm gonna bring it to the bike shop and check it out more.   I've been working hard and long, so don't worry if i don't post for a while, just means i've been busy and haven't had much time, but i'm sure you'll all understand.  Thanks for all the comments you've been putting on my blog, i love to read what you have to say, and feel free to say anything.  I'll be looking forward to posting again soon

Saturday, March 2, 2013

Raleigh Update

I am in the process of building and lacing up a internal three speed hub to an ARAYA 700c (14 X C32) rim.  So far I have it laced up, but now i have to true it.  I dragged everything i needed home to work on it last night, at least i thought i had everything.  I forgot my spoke wrench at the bike shop.  I grabbed the hub, the spokes, the rim, the equipment that goes with the hub, but not the spoke wrench.  I got it laced up just by finger tightening it, but now i need a truing stand, or so i thought.  I looked online, and you can use your bike frame, ya your frame.  All you need is a cable tie, your rim/wheel, and your spoke wrench.

Step 1: Either use a repair stand to put your bike on, or just flip over your bike, so that your wheel is free to move.

Step 2: Put the cable tie on your frame, next to your rim so that you can see if your rim is true or not, cut off the end so that the end touches the rim evenly.

Step 3: use your spoke wrench to ture your wheel.

Step 4: put you tire and tube beck on and remove the cable tie.

Step 5: Ride your bike with your new trued rim.

I will keep you all updated on how things work out as far as getting the rim working and gettting the rim to work on my Raleigh.

Keep on Biking...

New and Improved Raleigh

About two weeks ago I repainted my Raleigh, it was looking pretty bad underneath, under the bottom bracket, around the chain stays and the rear dropouts.  I tried to get as close to the original color as possible, it's a little brighter color but i like it.  I plan on reinstalling the headbadge, and putting on new decals sometime this summer.  I will